Aim:
To connect and test different types of sensors with a microcontroller.
Requirements:
- Arduino Uno or Raspberry Pi Pico
- Light sensor (LDR)
- Gas sensor (MQ-2)
- PIR motion sensor
- IR sensor module
- Jumper wires
- Breadboard
- Computer with Arduino IDE or Thonny IDE
Procedure:
- Set Up Your Microcontroller
- Connect your Arduino Uno or Raspberry Pi Pico to your computer.
- Open Arduino IDE (for Arduino) or Thonny IDE (for Pico).
- Choose Your First Sensor
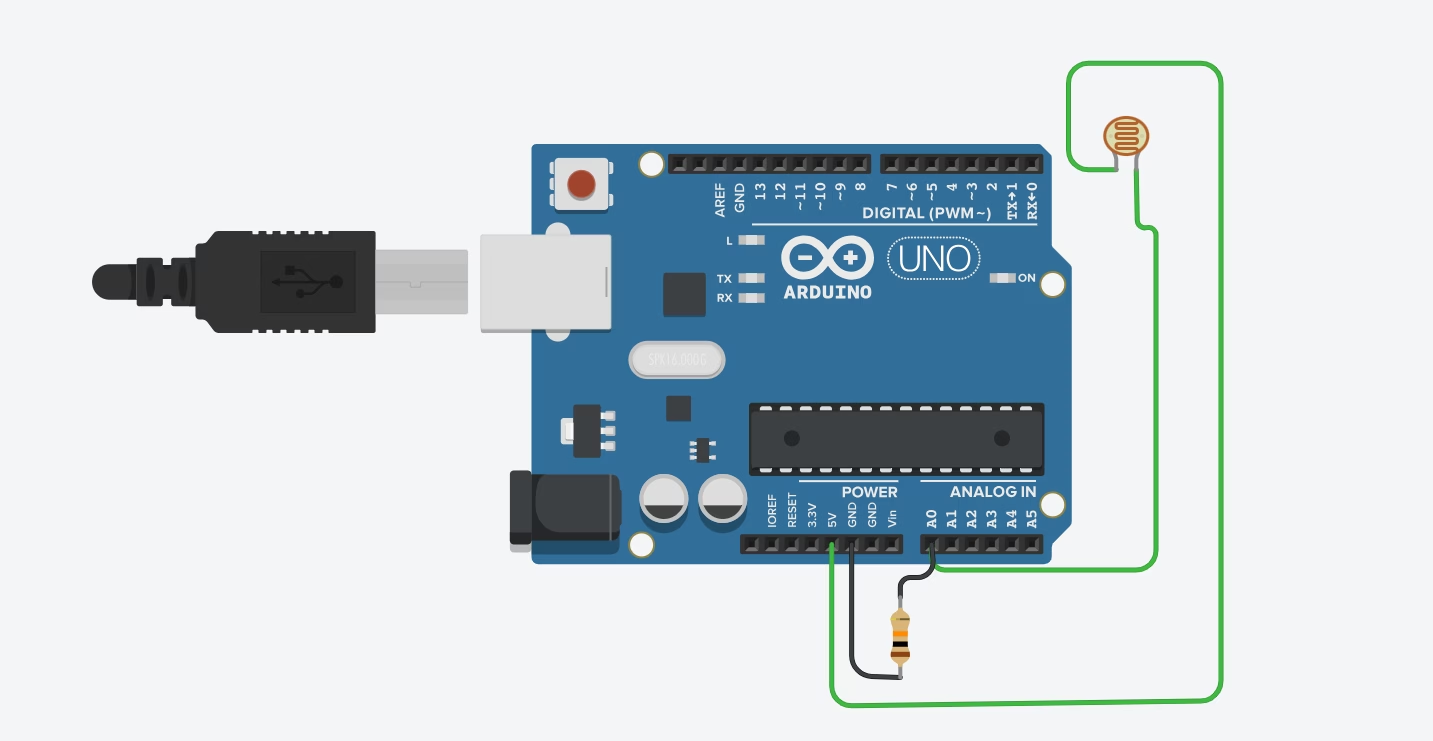
- For example, start with the LDR.
- Identify the sensor pins (Vcc, GND, Output).
- Wire the Sensor
- Connect Vcc to the board’s 5V or 3.3V pin.
- Connect GND to ground.
- Connect the output pin to an analog input pin (A0 for Arduino) or GP pin (for Pico).
- Upload Sample Code
- Use a simple “read sensor value” program.
- For Arduino: analogRead(A0);
- For Pico (MicroPython): adc.read_u16()
- Test the Sensor
- Shine light on the LDR — note the value.
- Cover it with your hand — see the change in value.
- Repeat for Other Sensors
- Gas Sensor: Blow gently across it to simulate gas presence.
- PIR Motion Sensor: Wave your hand in front of it and watch the output change.
- IR Sensor: Place an obstacle in front and observe detection.
- Record Observations
- Write down how each sensor reacted to changes.
Note whether the output was analog or digital.